|
Hot VWs - January 2007 - Project Mileage Motor - Part 3 Top end design and assembly
Project
Mileage Motor
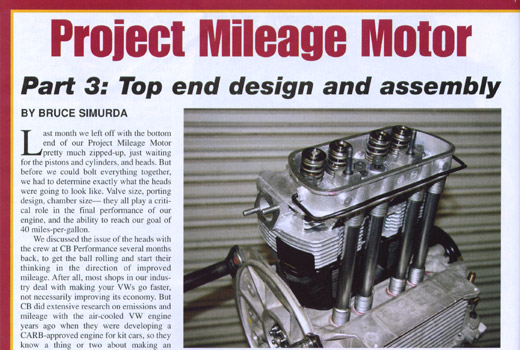
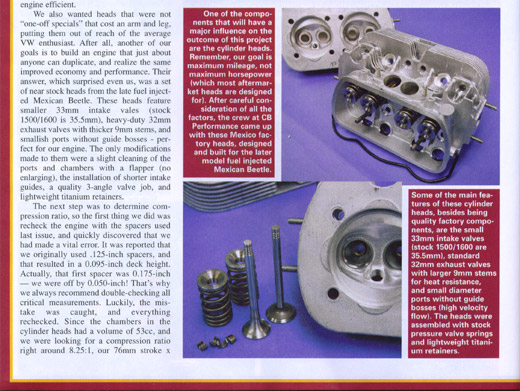
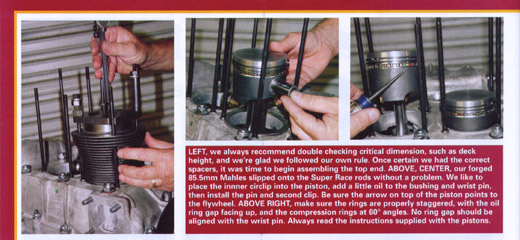
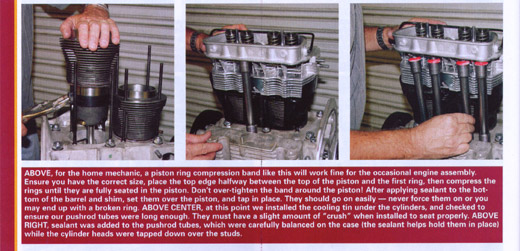
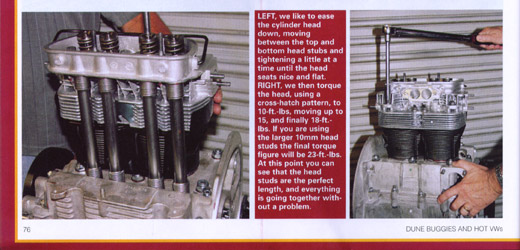
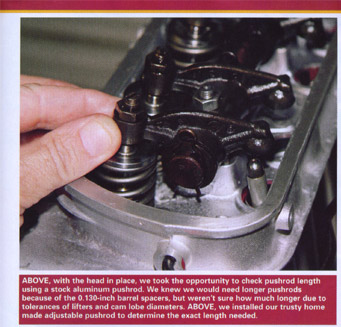
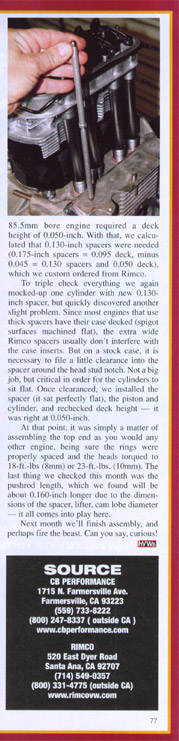
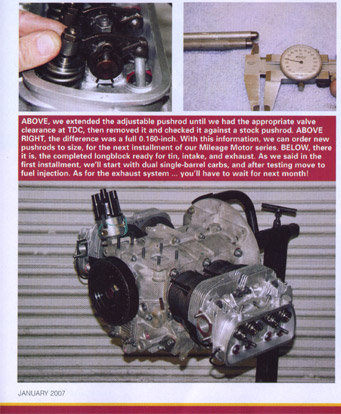
BY BRUCE SIMURDA Last month we left off with the bottom end of our Project Mileage Motor pretty much zipped-up, just waiting for the pistos and cylinders, and heads. But before we could bolt everything together, we had to determine exactly what the heads were going to look like. Valve size, porting design, chamber size - they all play a critical role in the final performance of our engine, and the ability to reach our goal of 40 miles-per-gallon. We discussed the issue of the heads with the crew at CB Performance several months back, to get the ball rolling and start their thinking in the direction of improved mileage. After all, most shops in our industry deal with making your VWs go faster, not necessarily improving its economy. But CB did extensive research on emissions and mileage with the air-cooled VW engine years ago when they were developing a CARB-approved engine for kit cars, so they know a thing or two about making an engine efficient. We also wanted heads that were not "one-off specials" that cost an arm and leg, putting them out of reach of the average VW enthusiast. After all, another of our goals is to build an engine that just about anyone can duplicate, and realize the same improved economy and performance. Their answer, which suprised even us, was a set of near stock heads from the late fuel injection Mexican Beetle. These heads feature smaller 33mm intake valves (stock 1500/1600 is 35.5mm), heavy-duty 32mm exhaust valves with thicker 9mm stems, and smallish ports without guide bosses - perfect for our engine. The only modifications made to them were a slight cleaning of the ports and chambers with a flapper (no enlarging), the installation of shorter intake guides, a quality 3-angle valve job, and lightweight titanium retainers. The next step was to determine compression ratio, so the first thing we did was recheck the engine with the spacers used last issue, and quickly discovered that we had made a vital error. It was reported that we originally used .125-inch spacers, and that resulted in a 0.095-inch deck height. Actually, that first spacer was 0.175-inch - we were off by 0.050-inch! That's why we always recommend double-checking all critical measurements. Luckily, the mistake was caught, and everything rechecked. Since the chambers in the cylinder heads had a volume of 53cc, and we were looking for a compression ratio right around 8.25:1, our 76mm stoke x 85.5mm bore engine required a deck height of 0.050-inch. With that, we calculated that 0.130-inch spacers were needed (0.175-inch spacers = 0.095 deck, minus 0.045 - 0.130 spacers and 0.050 deck), which we custom ordered from Rimco. To triple check everything we again mocked-up one cylinder with new 0.130-inch spacer, but quickly discovered another slight problem. Since most engines that use thick spacers have their case docked (spigot surfaces machined flat), the extra wide Rimco spacers usually don't interfere with the case inserts. But on a stock case, it is necessary to file a little clearance into the spacer around the head stud notch. Not a big job, but critical in order for the cylinders to sit flat. Once clearanced, we installed the spacer (it sat perfectly flat), the piston and cylinder, and rechecked deck heigh - it was right at 0.050-inch. At that point, it was simply a matte of assembling the top end as you would any other engine, being sure the rings were properly spaced and the heads torqued to 18-ft.-lbs (8mm) or 23-ft.-lbs. (10mm). The last thing we checked this month was the pushrod length, which we found will be about 0.160-inch longer due to the dimensions of the spacer, lifter, cam lobe diameter - it all comes into play here. Next month we'll finish assembly, and perhaps fire the beast! Can you say, curious! |